

Smart video doorbells have quickly become one of the most popular home security upgrades in the UK—and for good reason. They let you see who’s at your door, speak to visitors remotely, protect deliveries, and add an extra layer of security to your home.
But once you’ve chosen a doorbell camera, the next big question is usually the same:
How do you install a doorbell camera properly—without damaging your wall, wiring, or device?
This guide walks you through how to install a doorbell camera step by step, covering both battery-powered and wired installations, with UK-specific advice, real-world examples, and practical tips. Whether you’re a confident DIYer or a cautious first-timer, this article is written for real homes—not idealised manuals.
Why Installing a Doorbell Camera Correctly Matters
A doorbell camera is often the first line of contact with your home. Poor installation can lead to:
Weak Wi-Fi signal
False motion alerts
Loose mounting or vibration
Electrical issues (for wired models)
Long-term reliability problems
From our experience in the UK smart security market, most doorbell camera issues aren’t caused by the device itself—but by incorrect placement, wiring, or setup.
Types of Doorbell Cameras in the UK
Before installing anything, it’s essential to know which type of doorbell camera you’re working with.
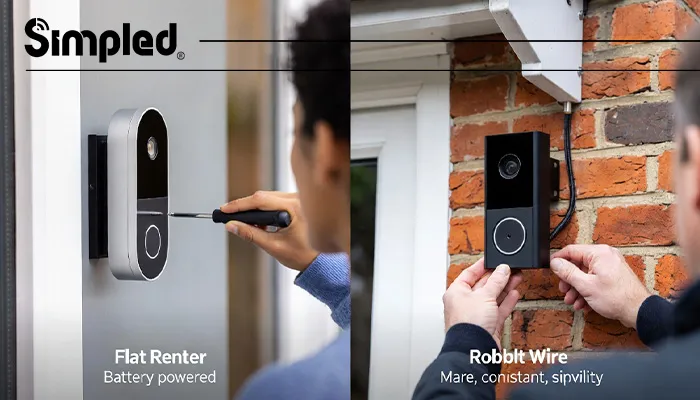
Battery-Powered Doorbell Cameras
These are the most popular option for renters and quick installs.
Pros
No wiring required
Easier installation
Ideal for flats and rental properties
Cons
Battery needs recharging
Slightly slower wake-up time
Wired Doorbell Cameras
These connect to your existing doorbell wiring.
Pros
Continuous power
Faster response time
No battery maintenance
Cons
Requires electrical awareness
Installation takes longer
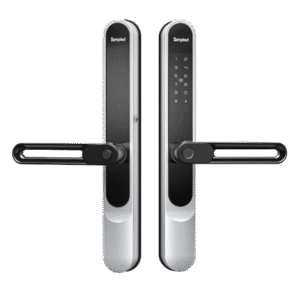
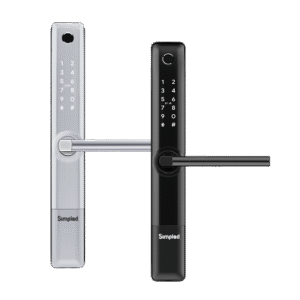
Many modern systems combine both options, allowing wired power with battery backup. If you’re looking for the right doorbell, explore Simpled digital door viewers to enhance your home security.
Tools You’ll Need Before Installation
Most doorbell camera installations only require basic tools:
Phillips or flathead screwdriver
Drill and masonry drill bit (for brick walls)
Wall plugs and screws (usually supplied)
Spirit level
Smartphone with the doorbell app installed
Wi-Fi password
Expert tip: Always use the screws provided by the manufacturer. They’re designed for the device’s weight and vibration tolerance.
Step-by-Step: How to Install Doorbell Camera (UK)
Step 1: Choose the Right Location
This is the most overlooked step—and the most important.
Ideal placement:
Around 1.2–1.4 metres from the ground
Facing visitors directly (not angled too high)
Clear of glass reflections and direct sunlight
Within strong Wi-Fi range
Avoid placing the doorbell:
Too close to the door frame (can block motion detection)
Directly facing a busy road
Under dripping gutters
Step 2: Turn Off Power (For Wired Doorbells)
If you’re installing a wired doorbell camera, safety comes first.
Switch off power at the consumer unit (fuse box)
Press the existing doorbell to confirm power is off
In older UK homes, wiring may not be labelled clearly—double check
Important: Even low-voltage doorbell wiring can damage a smart doorbell if shorted.
Step 3: Mount the Bracket
Most doorbell cameras attach to a mounting plate.
Hold the bracket against the wall
Use a spirit level to align it
Mark drill holes
Drill carefully (especially on brick or render)
Insert wall plugs
Secure the bracket firmly
For angled door frames, many doorbells include wedge mounts to improve viewing angle.
Step 4: How to Install a Doorbell Camera (Battery Model)
If your doorbell is battery-powered:
Charge the battery fully before installation
Insert the battery once the bracket is mounted
Attach the doorbell to the bracket until it clicks
Secure with the anti-theft screw
Battery models are ideal for quick installs and are common in UK flats and rentals.
Step 5: How Do You Wire a Doorbell Camera? (Wired Installation)
For wired doorbell cameras:
Remove the old doorbell button
Pull the two low-voltage wires through the mounting plate
Loosen the terminal screws
Connect wires (polarity usually doesn’t matter)
Tighten terminals securely
Attach the doorbell to the bracket
Tip: Take a photo of the wiring before disconnecting—it helps if you need to revert.
Step 6: Restore Power and Test
Turn power back on at the fuse box
The doorbell should light up or announce setup mode
If nothing happens, switch off power again and recheck wiring
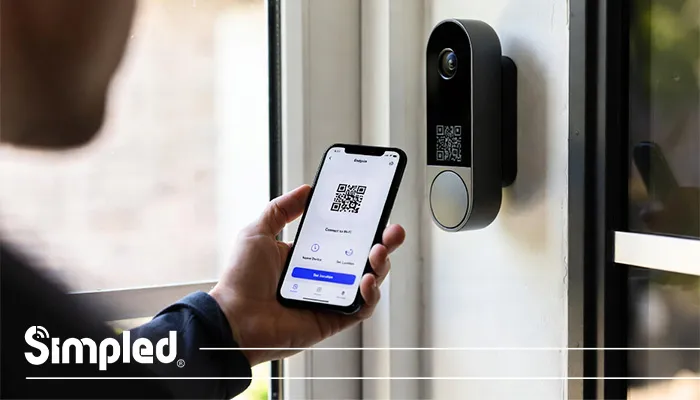
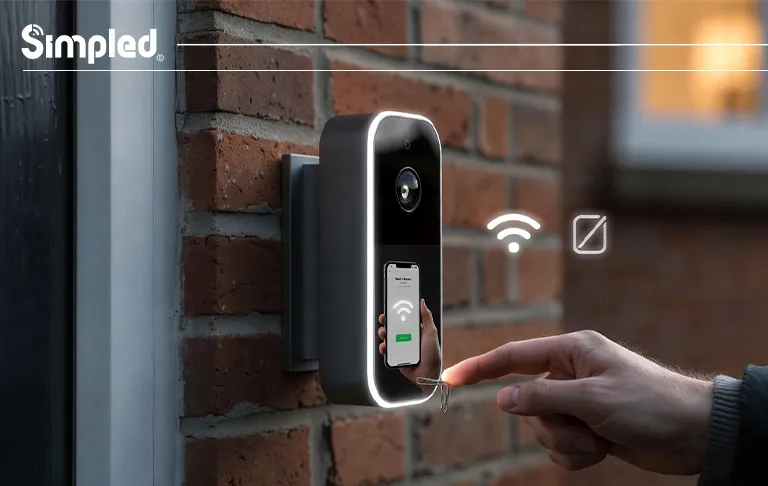
Setting Up the Doorbell Camera App
Once installed physically, software setup is just as important.
App Setup Basics
Download the manufacturer’s app
Create or log into your account
Scan the QR code on the device
Connect to your home Wi-Fi
Name the device and set location
Make sure your phone is connected to the same Wi-Fi network during setup.
Common Installation Mistakes to Avoid
Even experienced DIYers make these mistakes:
❌ Installing too high
❌ Ignoring Wi-Fi signal strength
❌ Over-tightening screws
❌ Skipping firmware updates
❌ Not testing motion zones
Taking 10 extra minutes during setup can save months of frustration.
UK-Specific Installation Considerations
Brick and Rendered Walls
Use masonry drill bits
Avoid cracking render
Fill old holes if relocating
Rental Properties
Use existing holes where possible
Keep original components
Avoid permanent modifications
Weather Conditions
Ensure the doorbell is IP-rated
Seal entry holes if wiring externally
How to Optimise Performance After Installation
After installation, fine-tuning makes a big difference.
Adjust Motion Zones
Exclude roads and pavements
Focus on doorstep area
Reduce false alerts
Improve Wi-Fi Stability
Use a Wi-Fi extender if needed
Avoid metal surfaces near the device
Update Firmware
Always update before daily use
Improves security and reliability
Video Doorbell Installation Cost
Are you ready to install these smart devices to monitor and protect your property? Or do you need an expert to perform this action instead of you? In this case of expert presence, you have to pay some money because of installation costs.
But how much money do you need to spend for the installation process of these doorbells? The installation cost is based on different matters, such as the following:
- Video doorbell brands
- Installation difficulty level
- Expert skill
- Needed tools
- Material of doorbell
- Place of doorbell
These devices are even working on data which is a slight delay, but it still is pretty good. You need to pay some money to activate 2-way voice, the weakest part of some doorbells.
Pay enough money to an expert and install your doorbell correctly. There is also a significant audio delay when trying to talk to someone if you have yet to install it correctly.
Smart Doorbells and Wider Home Security
A doorbell camera works best when part of a broader smart security ecosystem.
For example:
Paired with smart locks for verified access
Linked to indoor cameras or alarms
Integrated with voice assistants
At Simpled, we design smart security devices to work together seamlessly—focusing on durability, low maintenance, and clean installation.
When to Call a Professional Installer
DIY installation is suitable for most homes, but consider professional help if:
Wiring looks damaged
You’re unsure about the fuse box
The doorbell connects to a complex chime system
The property is listed or commercial
Conclusion: Installing a Doorbell Camera the Right Way
Learning how to install a doorbell camera doesn’t require advanced technical skills—but it does require care, preparation, and attention to detail.
Whether you’re installing a battery model or wiring a doorbell camera into an existing system, following the correct steps ensures:
Better performance
Fewer false alerts
Longer device lifespan
Stronger home security
A properly installed doorbell camera isn’t just a gadget—it’s a reliable part of your daily home protection.
FAQs
- Can I install a doorbell camera myself in the UK?
Yes, most doorbell cameras are designed for DIY installation with basic tools. - How high should a doorbell camera be installed?
Ideally between 1.2 and 1.4 metres from the ground. - Do I need an electrician to wire a doorbell camera?
Not usually, but professional help is recommended if wiring is unclear or damaged. - Can I install a doorbell camera in a rental property?
Yes, especially battery-powered models with minimal drilling. - What happens if Wi-Fi is weak at the front door?
A Wi-Fi extender or mesh system can significantly improve performance. - Is it easy to install a doorbell camera?
Yes, in most cases installing a doorbell camera is straightforward, especially with modern smart models designed for DIY installation. - Is it hard to install a doorbell camera?
Installing a doorbell camera is not hard, but the difficulty depends on the type of device and your home’s setup.


Leave a Reply