
Smart thermostats have quickly become one of the most practical and energy-efficient upgrades for UK homes. Whether you’re looking to lower heating bills or add comfort through automation, installing one is a straightforward process when done correctly.
This detailed smart thermostat installation guide will walk you through everything — from checking compatibility and wiring setup to final configuration and app pairing. By the end, you’ll be confident about how to install a smart thermostat safely and efficiently.
Why Upgrade to a Smart Thermostat?
Before jumping into the installation process, it’s worth understanding why smart thermostats have become so popular in UK households.
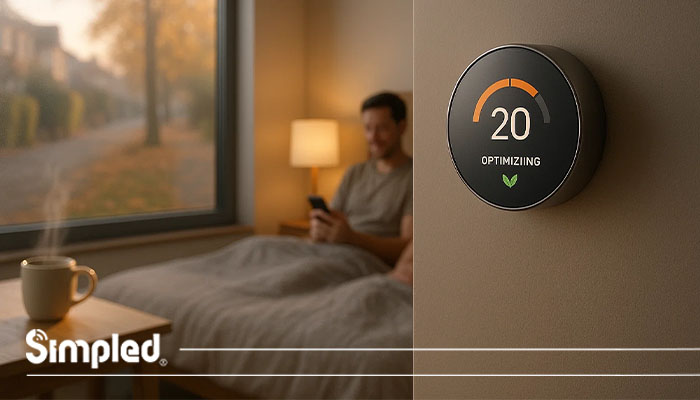
Unlike traditional thermostats, smart versions give you remote control via app or voice assistant, automatically learn your heating habits, and help reduce energy waste. Many UK users report saving up to 10–20% on annual heating bills simply by letting their smart thermostat optimize heating schedules.
Key Benefits:
Remote Control: Manage your heating from anywhere through your phone.
Smart Scheduling: The thermostat learns your daily routine and adjusts automatically.
Energy Insights: Track energy consumption and spot savings opportunities.
Smart Home Integration: Connects with Alexa, Google Assistant, or Apple HomeKit.
Comfort & Efficiency: Always wake up or return home to the perfect temperature.
Note: For seamless smart home integration, ensure your thermostat supports platforms like Matter, Alexa, or Google Home.
Step 1: Check Compatibility with Your Heating System
Not every thermostat works with every boiler, so your first step is to confirm compatibility.
Most Smart Thermostats Work With:
Combi boilers – Common in UK homes, providing heating and hot water from one unit.
System boilers – Connected to a separate hot water cylinder.
Conventional boilers – Older systems with hot and cold water tanks.
Tip:
Consult the manufacturer’s compatibility list before purchasing. Some systems (especially older models) might require an additional relay or adapter.
What special features do your products have in this part?
(For example: built-in boiler recognition, compatibility with underfloor heating, or support for zonal control.)
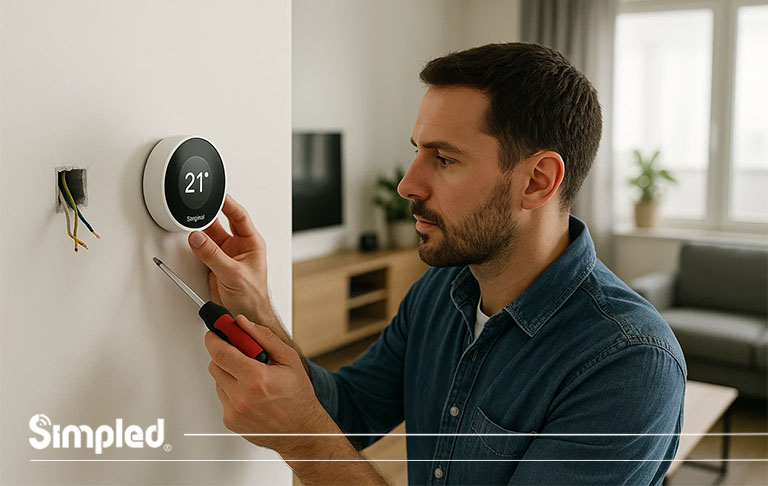
Step 2: Turn Off Power and Prepare for Installation
Safety first — always switch off the power at the mains before working with any thermostat wiring.
Tools You’ll Need:
Screwdriver set
Voltage tester
Drill (for wall mounting)
Pencil and level
Wall plugs and screws (usually included with the thermostat)
Preparation Steps:
Identify your existing thermostat’s location.
Take a clear photo of the current wiring setup — this helps during reconnection.
Remove the old thermostat carefully, labeling the wires if they aren’t color-coded.
Expert Tip: In UK homes, older thermostats may use different wiring colors (especially pre-2006). Always double-check live and neutral connections before touching any wires.
Step 3: Mount the Smart Thermostat
Most smart thermostats consist of two parts — the receiver (or heat link) and the display/control unit.
Installation Process:
Mount the receiver near your boiler or heating system, following manufacturer spacing guidelines (usually at least 30 cm away from metal surfaces).
Connect the wiring as per the instructions — typically live, neutral, call-for-heat, and earth connections.
Mount the wall display unit in a central, open area of the home — ideally 1.5m above the floor and away from direct sunlight or draughts.
UK Regulation Reminder:
All installations should comply with BS 7671 Wiring Regulations and Part P of the Building Regulations. If you’re not confident with electrical work, hire a qualified electrician or heating engineer.
Step 4: Connect to Wi-Fi and Configure the App
Once wired and powered, it’s time to bring your smart thermostat online.
Common Setup Steps:
Power on the thermostat.
Open the corresponding mobile app (Nest, Tado°, Hive, etc.).
Follow on-screen prompts to connect to your home Wi-Fi network.
Name your thermostat (e.g., “Living Room” or “Main Zone”).
Link it to your voice assistant or smart hub for hands-free control.
Pro Tip:
If your Wi-Fi router is far from your boiler area, use a Wi-Fi bridge for stable connectivity — especially in older UK homes with thick walls.
Simpled Perspective:
Our smart locks and future devices use BLE-based low-energy technology, ensuring long battery life and reliable connectivity even in large homes. For users combining smart locks with thermostats, Wi-Fi bridges enable full ecosystem integration.
Step 5: Create Heating Schedules and Automation
Once connected, you can program heating schedules that match your daily routine.
Example:
Weekdays: Warm up at 6:30 AM, off at 8:30 AM, resume at 5:30 PM.
Weekends: Gentle heating all day with eco-mode overnight.
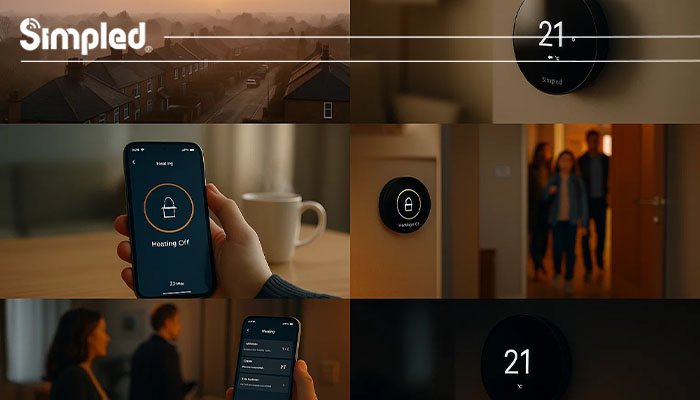
Automation Ideas:
Geofencing: Automatically switch heating off when you leave home.
Voice Commands: “Alexa, set the temperature to 21°C.”
Integration with Smart Locks: Automatically heat the hallway when the door unlocks.
Ask yourself: What unique automation or compatibility does your thermostat or product offer here?
(E.g., integration with Simpled smart locks or BLE-enabled temperature triggers.)
Step 6: Test and Fine-Tune
Once installed, always test your system thoroughly:
Turn the heating on and off via the app.
Confirm all zones respond correctly.
Check for connection dropouts or delayed responses.
Review the first few days of energy reports to spot irregularities.
If something doesn’t work as expected, recheck wiring connections and ensure firmware updates are installed.
Common Smart Thermostat Installation Mistakes to Avoid
Even simple setups can go wrong if you skip details. Avoid these frequent errors:
❌ Not cutting power before wiring.
❌ Incorrect boiler connection (especially live/neutral swap).
❌ Mounting near windows or heat sources — leads to inaccurate readings.
❌ Ignoring compatibility with heating zones or underfloor systems.
❌ Not testing after installation.
Expert Advice:
Always keep your wiring diagram, app login details, and Wi-Fi credentials in a safe place. You’ll need them if you reset or replace your device in the future.
When to Hire a Professional Installer
If your setup involves:
Dual-zone heating,
Complex wiring, or
Integration with multiple smart home systems —
It’s wise to hire a Gas Safe or NICEIC-registered engineer. They can install your thermostat quickly and ensure full compliance with UK regulations.
Note: Some UK home insurance policies also require certified installation for smart heating devices — check your terms
Maintaining Your Smart Thermostat
Smart thermostats require minimal upkeep, but regular checks improve longevity and performance.
Best Practices:
Update the app and firmware regularly.
Replace batteries annually (if applicable).
Clean the thermostat sensor with a dry cloth.
Review energy reports monthly for optimization opportunities.
Conclusion: A Smart Step Toward Energy Efficiency
Installing a smart thermostat is one of the most rewarding home upgrades for UK homeowners. It improves comfort, cuts energy costs, and integrates seamlessly with other smart devices — from lighting to locks.
At Simpled, we believe in creating connected home solutions that enhance convenience without complexity. Pairing your smart thermostat with Simpled digital door locks or Wi-Fi Bridge accessories makes your home smarter, safer, and more efficient — the way modern living should be.
FAQs
1. Can I install a smart thermostat myself in the UK?
Yes, most modern smart thermostats offer DIY-friendly installation. However, for complex wiring or multi-zone systems, professional help is advised.
2. Do smart thermostats work with combi boilers?
Yes, nearly all smart thermostats support combi boilers — the most common heating type in UK homes.
3. Is it safe to replace my old thermostat with a smart one?
Yes, as long as you turn off power before installation and follow manufacturer wiring instructions carefully.
4. How long does it take to install a smart thermostat?
Typically 30–60 minutes for DIY setups; professional installations may take 1–2 hours depending on wiring complexity.
5. Can smart thermostats save money on heating bills?
Yes, by learning your habits and optimizing heat schedules, they can reduce energy costs by up to 20% annually.


Leave a Reply